

This is how our 1.5-Year Adventure Traveling Australia with a Baby Started
In late 2020, after discovering we were expecting, Shaun and I began planning our “big lap” trip around Australia. We had a rough idea of what kind of vehicle and caravan we wanted, but a brand-new setup was out of the budget.


Step 1 – Finding the Right Caravan
To get a feel for what was available, we visited Sydney Caravan & Camping show. We quickly learned three things:
1. Caravans are HEAVY.
2. The newer layouts weren’t what we were looking for.
3. They all looked the same—generic, bland, and colorless.
On our drive back to Newcastle, we started considering an older caravan that we could renovate ourselves and get a feel for exactly what we wanted. Since Shaun is a carpenter, he could modify the layout to suit our needs.
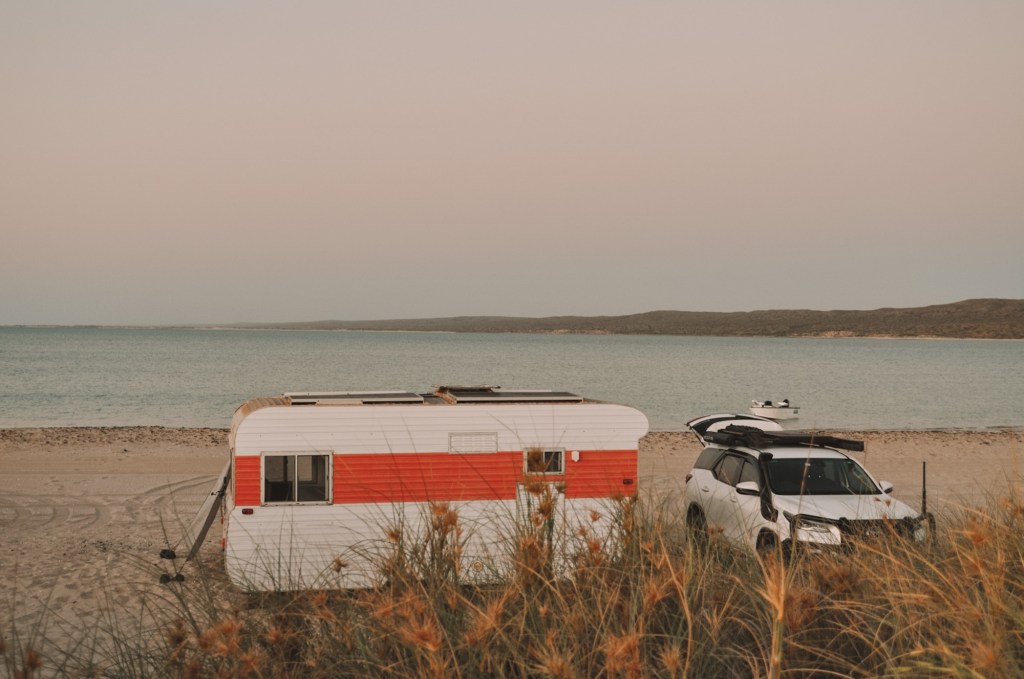
Then, just a week later, we spotted a 1980s Millard caravan for sale on the Central Coast. We drove an hour to take a look, and after weighing the pros and cons, we decided to just go for it. The seller originally listed it for $8,000, and after a bit of negotiation, he accepted our offer at $6,000.
The caravan had an original brown interior with orange flooring, a BC model fridge, a squeaky bed, and a water leak in the ceiling. The seller admitted he took it off-road and needed something more capable. Ironically, the “off road” caravan park he was talking about was one of the most mild dirt roads we went on during our trip.
On the way home, we stopped at my dad’s house. My stepmom joked that we had spent all our money upgrading our car (to a Toyota Fortuner) and now couldn’t afford a “decent” caravan. Little did we all know, we would fall in love with it and never want to part with it.
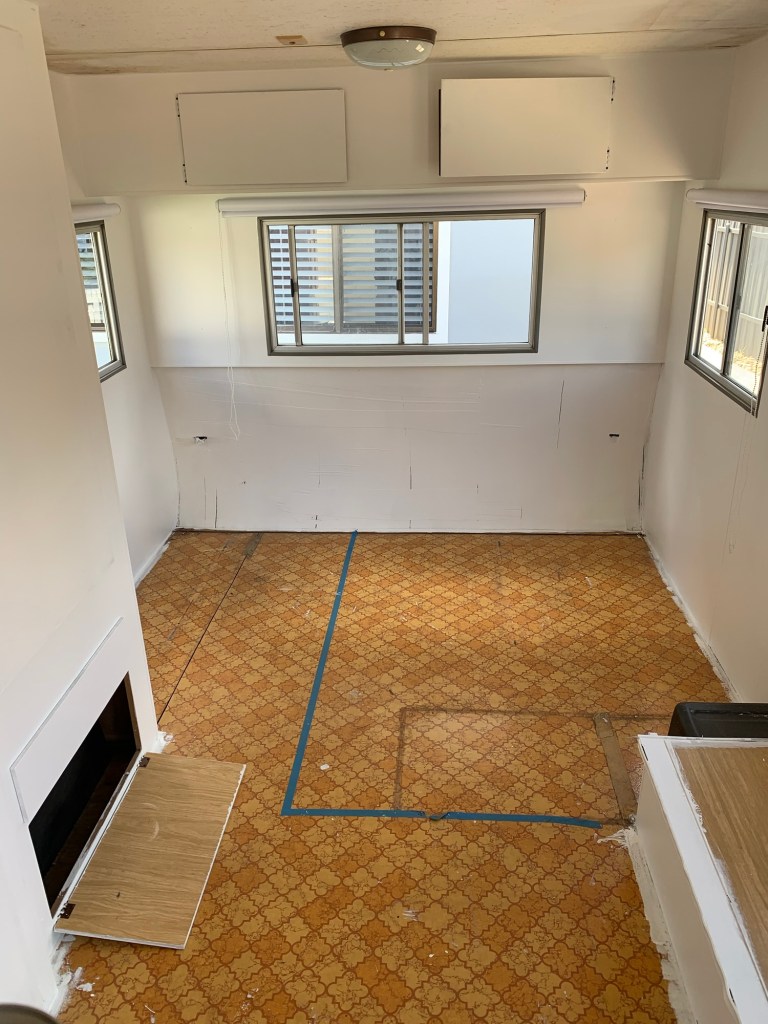
Step 3 – Start Renovations and Fall in Love
Before we went on our first test camping trip, we made some small layout adjustments to suit our growing family:
• Shaun removed the L-shaped couch and kept one bench seat to create space for a north-south facing bed.
• The new bed allowed us to add a side table to store essentials like a portable toilet, shoes, broom, laundry items, tech gear ect.
• We removed the bunk bed (since we weren’t expecting twins!), which gave us better access for Max’s cot. This also allowed Shaun to build a dedicated area for a bin, a longer kitchen bench, and additional under-cupboard storage.
• We installed a basic electrical system.
• We painted the entire interior bright white.
• We replaced the curtains with white roller blinds.
That was it!
After taking a few trips, Shaun and I completely fell in love with the character of our old caravan, which we eventually named Peachy.
Step 4- Renovations 2.0
When we returned from a trip to Patonga on the East Coast at 37 weeks pregnant, we made the decision to keep Peachy and make some final upgrades to prepare for full-time travel and off-grid living:
• Swapped out the old rattling Engle fridge for a 65L Bushman’s fridge.
• Installed a water pump.
• Added a tunnel boot to store the baby Webber Q.
• Installed a Dometic awning for shade and weather protection.
Fun fact, the electrical system ended up costing us more than the caravan itself, but it was well worth it given how much free camping we planned to do!
Step 5- Time to Enjoy! Hitting the Road with a 6-Month-Old
Max was born in July 2021, and before we knew it, six months flew by. In January 2022, we packed up our home on wheels and set off on our adventure around Australia.
We had a few minor hiccups along the way—our door latch broke three times, a stone hit the water line on a dirt road, we had more leaks (solved with more silicone!), and the wall semi-detached at one point (LOL). But despite these challenges, the adventure of not just traveling Australia but doing it in a caravan with so much character became a memory we will never forget.

For more renovation photos and travel inspiration, follow us on Instagram: Roam_ N_ Round
Or Facebook: http://www.facebook.com/roamnround?mibextid=LQQJ4d

Leave a comment